Your water meter is the simplest and most effective tool available for detecting hidden water leaks in your home. The meter test takes just a few minutes, requires no special equipment, and can confirm whether water is escaping from your plumbing system even when you cannot see or hear a leak. Every Rockingham homeowner should know how to perform this basic check, particularly if they have noticed an unexplained increase in their water bill or any of the signs of a hidden water leak.
This step-by-step guide explains how to locate your water meter, read it correctly, perform the meter test, and interpret the results.
Step 1: Locate Your Water Meter
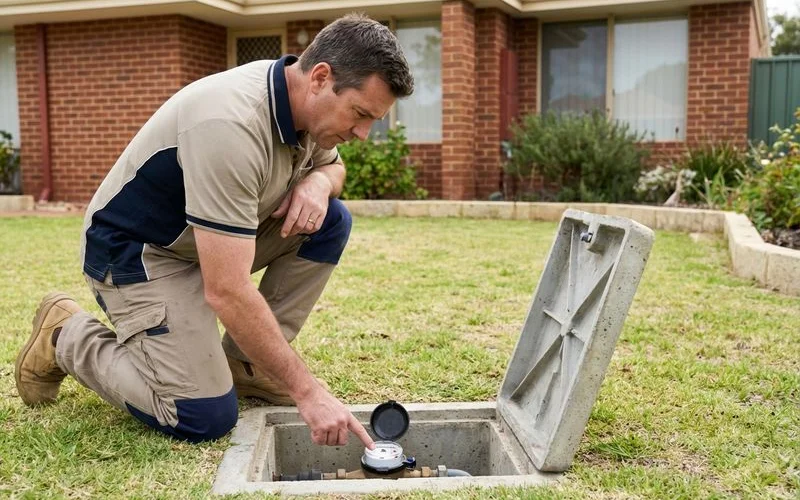
In most Rockingham homes, the water meter is located at the front of your property, near the boundary line with the street or footpath. It is housed in a rectangular concrete or plastic pit set into the ground, covered with a lid that may be labelled “WATER” or display the Water Corporation logo.
The meter pit is typically positioned near your driveway, front garden path, or the front corner of your property. In some older properties or properties with unusual layouts, the meter may be in a different location, but it will always be between the Water Corporation main in the street and the point where the supply pipe enters your property.
To access the meter, lift the lid of the meter pit. You may need a flat-head screwdriver or similar tool to pry up the lid if it is tight. Be careful when opening the pit as spiders, ants, and other insects sometimes nest inside. Check visually before putting your hands inside.
The meter itself is a brass or composite device with a dial face on top. Some newer meters have a digital display. The meter will have numbers displayed in either kilolitres or litres, and most meters also have a small triangle, star, or wheel that serves as a flow indicator.
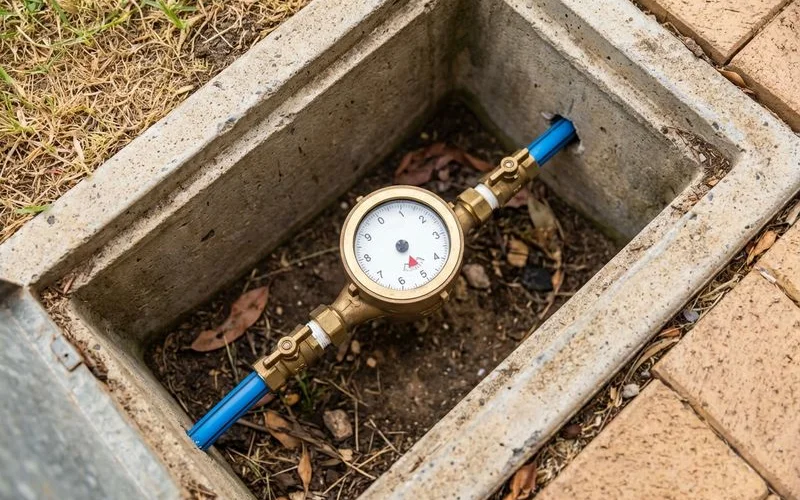
Step 2: Understand Your Meter’s Components
Before performing the leak test, take a moment to understand what the different parts of your meter display mean.
The main dial or digital display shows your cumulative water usage. This is the reading that Water Corporation uses to calculate your water bill. The numbers to the left of the decimal point represent kilolitres, and the numbers to the right represent litres. For example, a reading of 01234.567 means you have used 1,234 kilolitres and 567 litres since the meter was installed or last reset.
The flow indicator is the small triangle, star, or spinning wheel on the meter face. This is the most important component for leak detection. The flow indicator rotates whenever water is flowing through the meter, even in very small quantities. If the flow indicator is moving, water is flowing through the meter and into your property’s plumbing system.
The sweep hand on some meters is a larger needle that rotates around the dial face. One full rotation of the sweep hand typically represents 1 litre or 10 litres, depending on the meter model. This provides a more sensitive measure of flow than the main digit display.
Some newer properties in Rockingham have digital smart meters that transmit usage data remotely. These meters may have a digital display that shows current flow rate. If your meter has a digital display, check the manufacturer’s instructions for how to read it, or contact Water Corporation for guidance.
Step 3: Turn Off All Water Usage
For the meter test to be accurate, you must ensure that absolutely no water is being used anywhere on your property. This includes all taps inside and outside the house turned off completely, all toilets not running or filling, the dishwasher and washing machine turned off and not mid-cycle, the hot water system not currently filling or heating, all irrigation systems and garden hoses turned off at the tap, evaporative air conditioners turned off if they use a water supply, and swimming pool auto-fill systems turned off.
Take a walk through your home and garden to verify that everything is off. Flush each toilet and wait for the cistern to finish filling completely before beginning the test. If a toilet cistern is slowly leaking into the bowl, it will register as flow on the meter and may give a misleading result if you are trying to test for pipe leaks rather than fixture leaks.
Check external taps as well. A garden tap left slightly open or with a dripping hose connection will register as flow on the meter.
Step 4: Perform the Meter Test
With all water usage turned off, go to your water meter and observe the flow indicator. Watch it closely for at least two full minutes. The flow indicator should be completely stationary if no water is flowing through the system.
If the flow indicator is not moving, your plumbing system is not currently leaking. This does not completely rule out very small or intermittent leaks, but it indicates that there is no continuous flow of water escaping from your system at this time.
If the flow indicator is moving, water is flowing through the meter even though all taps and appliances are off. This confirms that there is a leak somewhere in your plumbing system between the meter and your home, or within the home itself.
The speed at which the flow indicator moves gives you a rough indication of the severity of the leak. A slow, barely perceptible movement indicates a small leak such as a dripping valve or a pinhole pipe leak. A steady rotation indicates a more significant leak that is losing a substantial amount of water. A fast rotation indicates a major leak that requires urgent attention.
Step 5: Perform the Extended Meter Test
If the flow indicator appears stationary during the two-minute test, but you still suspect a leak based on your water bills, perform an extended test using the meter reading numbers.
Write down the exact meter reading, including all digits after the decimal point. Make sure all water usage remains off for the next one to two hours. Do not flush toilets, wash hands, or use any water during this period. After the waiting period, return to the meter and read the numbers again.
If the reading has changed, even by a small amount, water has flowed through the meter during the test period. This indicates a slow or intermittent leak that was not fast enough to move the flow indicator visibly during the short test but is still losing water continuously.
Calculate the difference between the two readings. This difference represents the amount of water lost to the leak during the test period. Multiply this by 24 to estimate the daily water loss, or by the number of hours in your test period to get a more precise figure.
For example, if the meter reading increased by 0.005 kilolitres (5 litres) over a two-hour period, the leak is losing approximately 2.5 litres per hour, or 60 litres per day. Over a quarterly billing period, this amounts to approximately 5,400 litres of wasted water.
Step 6: Narrow Down the Leak Location
If your meter test confirms a leak, you can narrow down the general location by testing whether the leak is between the meter and the house, or inside the house.
Most Rockingham homes have a main shutoff valve where the supply pipe enters the building. This valve is typically located at the front of the house, near the hot water system, or in a meter box on the side of the building. Turn this valve off completely.
Return to the water meter and check the flow indicator again. If the flow indicator stops moving after closing the internal shutoff valve, the leak is inside the house, somewhere in the internal plumbing system. If the flow indicator continues to move after closing the internal shutoff valve, the leak is in the underground supply line between the meter and the shutoff valve.
Underground supply line leaks are common in Rockingham due to the sandy soil conditions, tree root activity, and the age of copper and poly pipe supply lines in many established suburbs. These leaks may not be visible on the surface because the water soaks into the sandy soil and disperses before reaching the surface.
Step 7: Take Action
If the meter test confirms a leak, your next step depends on the severity and location.
For small internal leaks, check all taps, toilet cisterns, hot water system valves, and flexible hose connections for visible drips or weeping. Many small leaks are caused by worn tap washers, faulty toilet flush valves, or deteriorating flexi hoses that can be repaired or replaced relatively quickly.
For larger internal leaks that are not visible, or for any underground supply line leak, contact a professional plumber for leak detection services. Professional leak detection uses acoustic equipment, thermal imaging, and pressure testing to locate concealed leaks without unnecessary excavation or wall damage.
For urgent leaks where the meter is spinning rapidly, turn off the main shutoff valve to stop water loss and prevent further damage while you arrange for a plumber to attend.

Regular Meter Checks Save Money
Making the water meter test a regular habit can catch leaks early before they cause significant damage or waste large amounts of water. Perform the test monthly, or whenever you notice any of the warning signs of a hidden leak such as unexplained damp patches, mould growth, or changes in your water bill.
Water Corporation may provide an allowance or adjustment on your water bill if you can demonstrate that a high bill was caused by a concealed leak that has since been repaired. Contact Water Corporation with your repair invoice and details to inquire about a leak allowance.
Plumber Rockingham provides fast and accurate leak detection services across Rockingham, Baldivis, Port Kennedy, Secret Harbour, Warnbro, and all surrounding suburbs. If your meter test confirms a leak that you cannot locate, contact us to arrange a professional leak detection inspection. We will find the leak, explain your repair options, and get it fixed before it causes further damage to your home.